Yarn fabric basket DIY – with room for a bit of improvement
Recently I have seen a lot of Yarn fabric basket DIY´s out there, both homemade and bought. And baskets are great for storage, which I need a lot of, so I thought I would give it a go. See the youtube video here.
I had this beautiful brocade fabric from Stoffstil, and because it Is so thick and heavy, I was unsure of wat to do with it. So I decided to give it a go to try and make a homemade basket that I could use for yarn and knitting works in progress.
How to make the Yarn fabric basket DIY
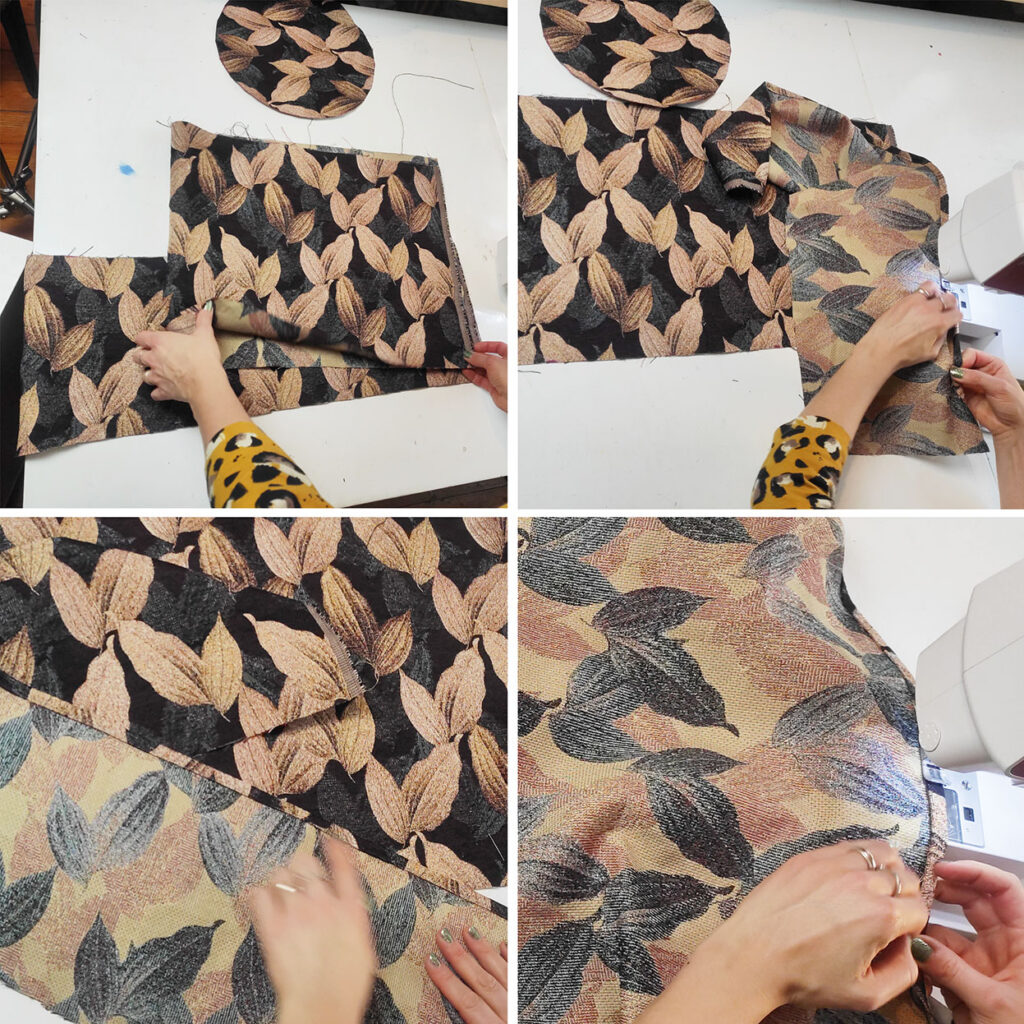
I found a round tray to make the bottom from. Placed it on the fabric and traced around it.
To find out the circumference I measured al the way around and added a few extra cm. if it is hard to measure around your plate or tray there are lots of help to calculate it on the internet. Or if you remember any math from school. Which I did not feel like trying to that day.. last time I did that I made a mistake and it did not fit in the end, so measuring around seemed safer.
I measured how high I wanted the basket and cut a piece that height and the width plus a few cm extra, that I measured around the tray from before.
For an extra piece around the basket, to act like I pocket around the basket I cut a piece the same width as the other, but a bit lower.


Time to sew the pieces for the Yarn fabric basket DIY together
It would be a good idea to use a zigzag sticth or a serger on all the pieces, because the fabric does fray a bit. I was too impatient to do that on the day. I am sure I will regret that later.
For both the wide rectangular pieces for the tube of the basket I folded the top edge 1 cm down towards the back. Twice the hide the raw edge and stitched that in place. That looked good, and it is a finish I enjoy to use.
Then I placed the two wide rectangular pieces on top of each other, but pieces wit the front of the fabric facing towards the front. make sure the two bottom edges are aligned. I then aligned a part of the circle edge with the bottom edge of the two other pieces and began to sew. I did not start right at the edge of the rectangular pieces, but a few cm in, to make t easier for me when sewing the tube together.
It luckily fit all the way around the circle. There was even a bit too much width on the rectangular pieces, but I corrected that when sewing the tube together. that is much better than the tube being too small.
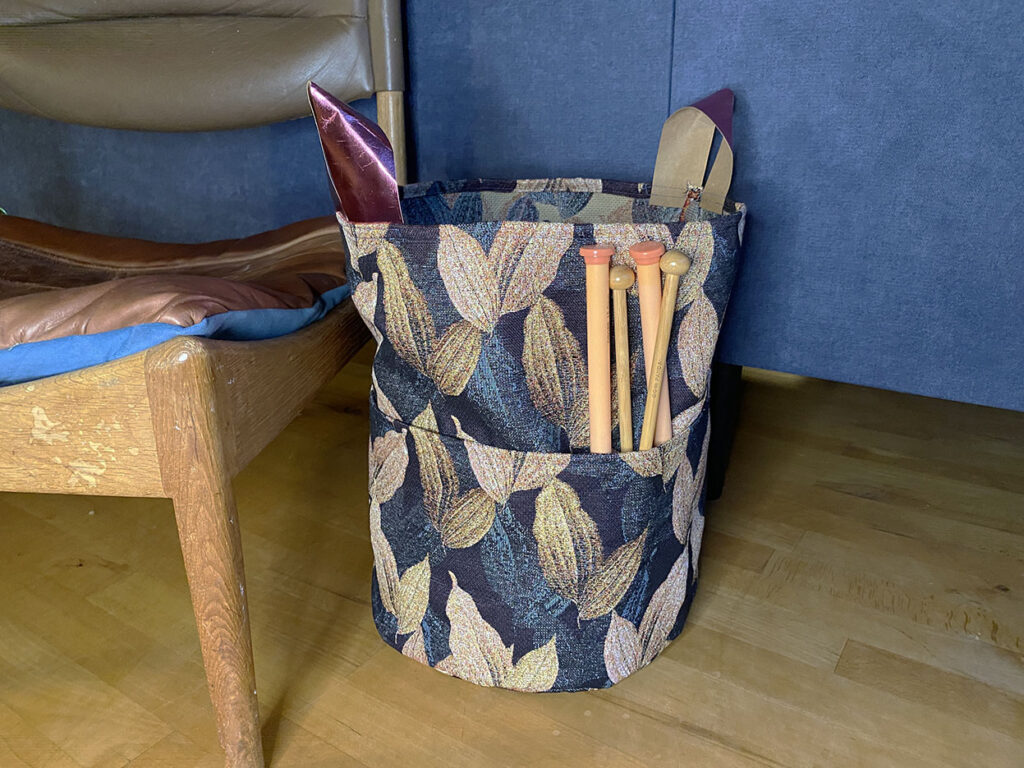
I added some handles to the basket with the gorgeous pink Papfab material that I also bought from Stoffstil. See another great Stoffstil make here.
Improving the Yarn fabric basket DIY
You can cut a piece of cardboard just a little bit smaller than the tray and put that inside to make the basket stand sturdier, but when you just put soft yarn inside, it will stay standing anyways as long as the fabric used for it is stable enough.
After using it for a while I have also thought of sewing some vertical lines through the two tubes, to make the outer layer into more specific pockets for knitting needles, and not just one big wide pocket where things can get lost in.
It is always fun to get an idea and then bring it to life, even if you do not make the perfect version the first time.